MariaDB Galera Cluster Replication
Extending the topic around database auto-clustering, we’d like to cover MariaDB Galera Cluster, high availability synchronous replication solution, that provides:
- True multi-master topology
- Automatic new node provisioning
- No data loss when nodes crash
- Data replicas remain consistent
- Automatic membership control
- No complex and time-consuming failovers
- Parallel transaction execution on all cluster nodes
- No slave lag
- No lost transactions
- Reads/writes scalability
- Smaller client latencies
- Support of multi-cloud and multi-region deployments
According to official documentation, Galera implements so-called certification-based replication. The basic idea is that the transaction to be replicated - the write set - not only contains the database rows to replicate, it also includes information about all the locks that were held by the database (ie. InnoDB) during the transaction. Each node then certifies the replicated write set against other write sets in the applier queue, and if there are no conflicting locks, we know that the write set can be applied. At this point, the transaction is considered committed, after which each node continues to apply it to the InnoDB tablespace.
This approach is also called virtually synchronous replication since it is logically synchronous, but actual writing (and committing) to the InnoDB tablespace happens independently (and thus, strictly speaking, asynchronously) on each node.
In Jelastic, Galera Cluster can be automatically activated while creating the environment. The default topology consists of 2 ProxySQL load balancers and 3 MariaDB instances.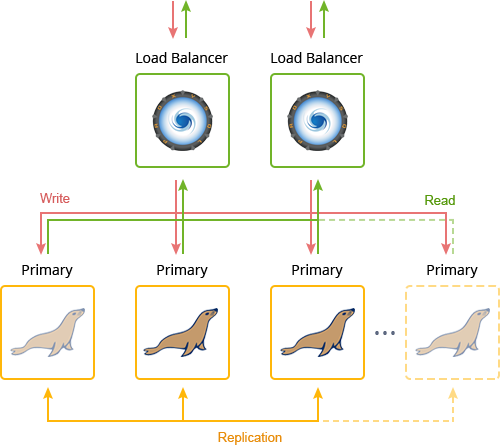
Galera Cluster Requirements
In Galera, databases shall comply with some requirements. The key ones user should follow creating tables are:
- InnoDB Storage Engine. Data must be stored in the InnoDB transactional storage engine.
- Primary Keys. Every table that is to be replicated must have an explicit primary key, either a single or a multi-column index.
The full list of the well-known limitations can be found in the official documentation.
MariaDB Galera Cluster Installation
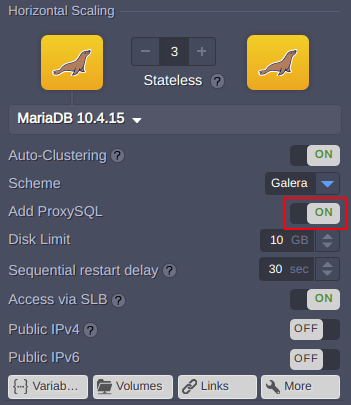
Navigate to Jelastic dashboard, click Create Environment and select MariaDB server within topology wizard. Then activate Auto-Clustering and choose Galera scheme. You can increase the default number of databases by pressing “+” in the Horizontal Scaling block.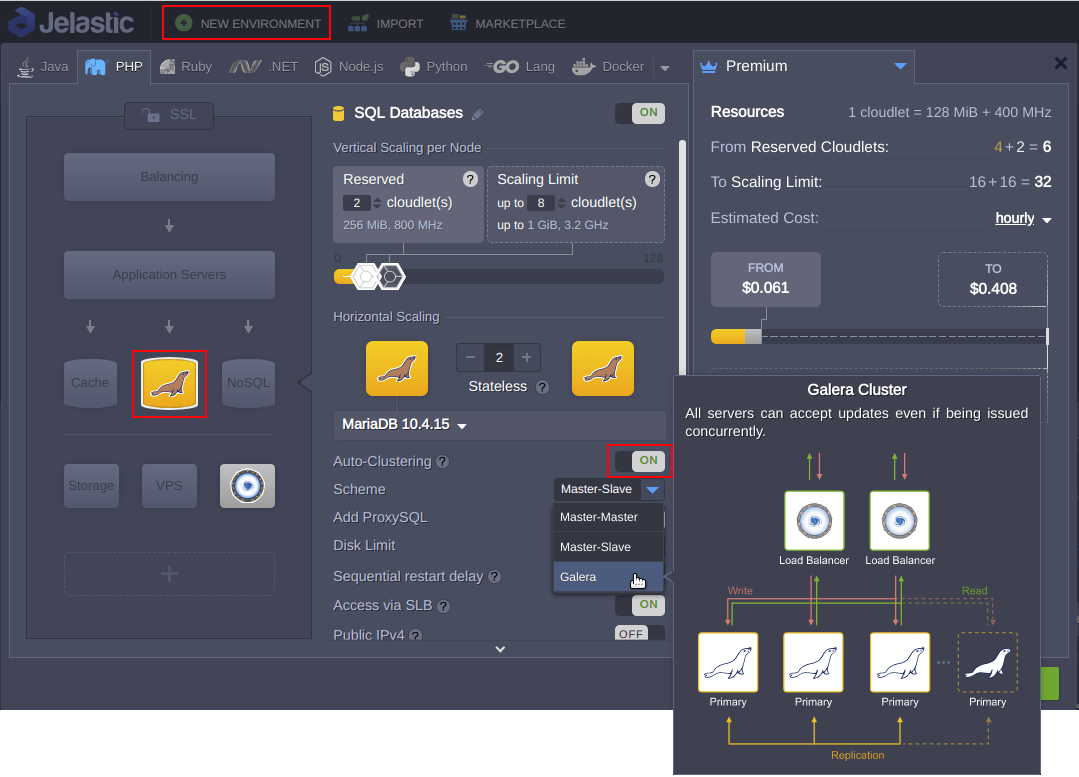
If required you may exclude ProxySQL layer from the cluster topology before installation with the respective switch. Keep in mind that you won’t be able to do that later and vice versa if you switch it off before installation you will not be able to add the proxy layer afterward.
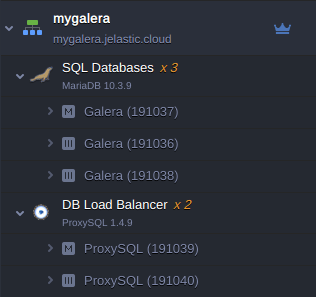
In a few minutes, the environment will be created with the chosen topology and pre-configured interconnections.
You can perform the state-of-health monitoring of the cluster nodes via the Orchestrator admin panel that can be accessed with the credentials from the email related to ProxySQL Load Balancer deployment. The cluster members are shown at the panel as separated clusters with one instance inside.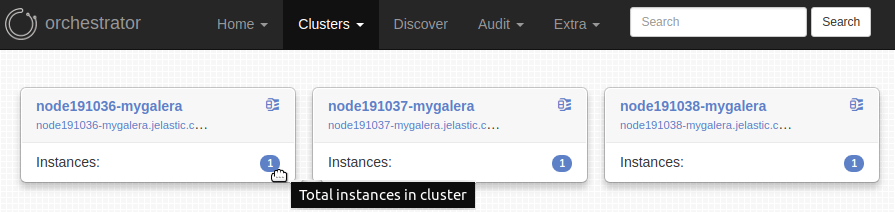
Application Connection to MariaDB Galera Cluster
Let’s establish a connection to our MariaDB Galera Cluster from Java web-application, using ProxySQL load balancer as an entrypoint. Follow the linked guide to find out about the connection to other types of applications.
The creation of each master node within MariaDB cluster is accompanied by the email with phpMyAdmin credentials. Accessing the database via phpMyAdmin panel is useful for debugging or performing some manual operations on the databases.
1. Log in to phpMyAdmin using Admin Panel URL, Username and Password (received in the email). Choose the existing database test (or create whatever you want) at the left pane. After that in the right pane you will see there are no tables in the database test.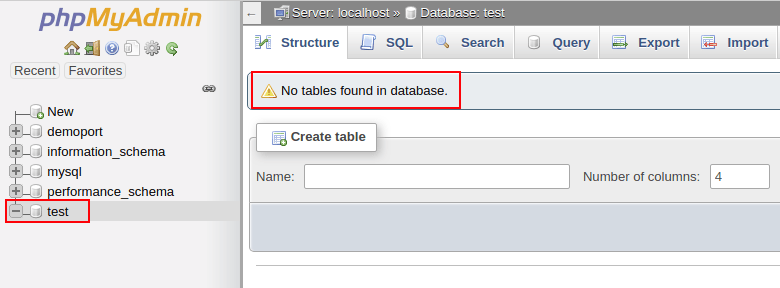
2. Get back to Jelastic dashboard. We use a separate environment with a Tomcat 9 application server for this example. Now, we have to create Database config file for our test application. To do this, click on the Config icon next to your compute node, then navigate to /opt/tomcat/temp directory and create mydb.cfg file using platform built-in <a style="margin: 0px; padding: 0px; text-rendering: optimizelegibility; box-sizing: inherit; font-style: inherit; font-variant: inherit; font-weight: inherit; font-stretch: inherit; line-height: inherit; font-family: inherit; font-size: 16px; ve
